Project 1: Screencasting
Contact Online@JSU if you need any assistance with this project. We are glad to help.
Step 1- Set-up Screencast-O-Matic
There are many tools for screencasting. See the Media Badge Resources for a list of choices. For this project, however, use Screencast-O-Matic (SoM). SoM is an excellent screencast tool which is free and very simple to use. SoM integrates with YouTube to make uploading and sharing screencasts simple. If SoM is a preferred tool, consider purchasing the full version for a nominal cost. The paid version offers more features such as editing and removal of the free version watermark.
While SoM runs from a browser, more functionality and reliability comes from installing the small SoM application to your device. In Step 1, install the SoM app on your PC or Mac.
Tutorials
Download and Overview of Using SoM
Screencast-O-Matic Recorder Download Link
SoM Website- http://screencast-o-matic.com/

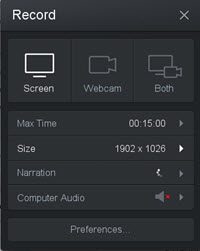
Step 2- Record your First Screen Cast (Practice Run)
Give it a try. Click buttons. Fiddle with the options. Record. Play around with the SoM recorder to gain an understanding of the tool. Review and delete any recordings you make. In Step 3, you will create a more applicable screencast. Use this step to practice.
Tutorials
SoM General Help (Use the search tool for more tutorials than first listed on this page.)
SoM How-to Videos
Step 3- Record your First Screen Cast (Practical Application)
Think of an authentic use of a screencast for one of your courses. This screencast might be a welcome video or a demonstration. Whatever you choose, plan to leverage the screen recording aspect of a screencast. Project suggestions include:
- Record PowerPoint with audio for a video lecture.
- Open a syllabus in Word to create a course overview.
- Record the steps to set-up an online service that accompanies your text.
- Create a screencast for any other purpose desired.
Review the screencast tips at the bottom of this page.
After creating a screencast, save and/or upload the video to YouTube or Screencast-O-Matic. See Step 4.
Examples
Welcome Video Tips (video example)
Video Feedback Tips (video example)
Syllabus Review Tips (video example)
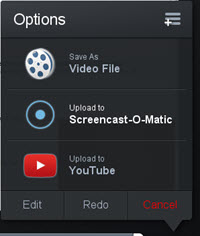
Step 4- Upload Your Screencast to YouTube
After your screencast is recorded, preview your work. If the screencast is acceptable, step through the options to share and save your screencast. For this step, a Gmail (YouTube) account or a Screencast-O-Matic account is required. The tutorials below are for the YouTube option.
Tutorials
Share Screencast to YouTube
Set-up YouTube account
YouTube Video Manager
Step 5- Submission
The final step of Project 1 is to share your screencast with others. This step is also the initial submission of Project 1. All projects are to be shared to the JSU Certification Community in Office 365 Yammer.
Submission is a two step process:
- Copy/paste the screencast URL (from step 4) to the Online@JSU Community. Include a short description with any information necessary to place the video in context. Community members and Online@JSU staff will provide feedback and suggestions.
- Incorporate suggestions into the video and re-post to the Online@JSU Community. Include in a reflection on the project which includes thoughts on how screencasts might be utilized in courses or the workplace.
This revised screencast and reflection is your final submission for Project 1.
Direct link to Online@JSU Community- Online@JSU Community
Tutorials
Share URL with the Online@JSU Community
Join the Online@JSU Community
Yammer (Online@JSU Community) Help
Ideas and Tips
- Prepare- Check desktop background; hide icons; disable pop-up notifications such as email; do a sound check. See the videos below for more excellent tips.
- Script- A script will help make your screencast efficient and clear. You need not read the script word for word. Use it as a guide.
- Perfection- Don't try to create a perfect screencast. Major errors can be corrected with a re-take, but minor glitches are more often only replaced by other minor glitches during a re-take. Let your screencast be human.
- Shorter- Screencasts are most effective short and concise. A perfect length is 3-5 minutes with a maximum length of 15 minutes. If your screencast needs to be longer, the best practice is to create a series of videos. A collection of short videos is more effective than a single longer video.
- Closed Captioning- Many video services, such as YouTube, allow you to upload a script to easily create closed captioning. You may also use this script as a transcript to ensure accessibility for all of your students. See the Accessibility Certification for more information and instructions regarding creating accessible content.
- 6 Must Do Tips For A Quality Screencast
- Tips: Before Recording Your Screencast
- Top Five-ish Screencasting Tips
- 6 Tips for Creating Engaging Video Lectures That Students Will Actually Watch
- MOOC Design Tips: Maximizing the Value of Video Lectures